Create a shipping label
- Now you are at the Orderpage, click on More actions→ Create Label.

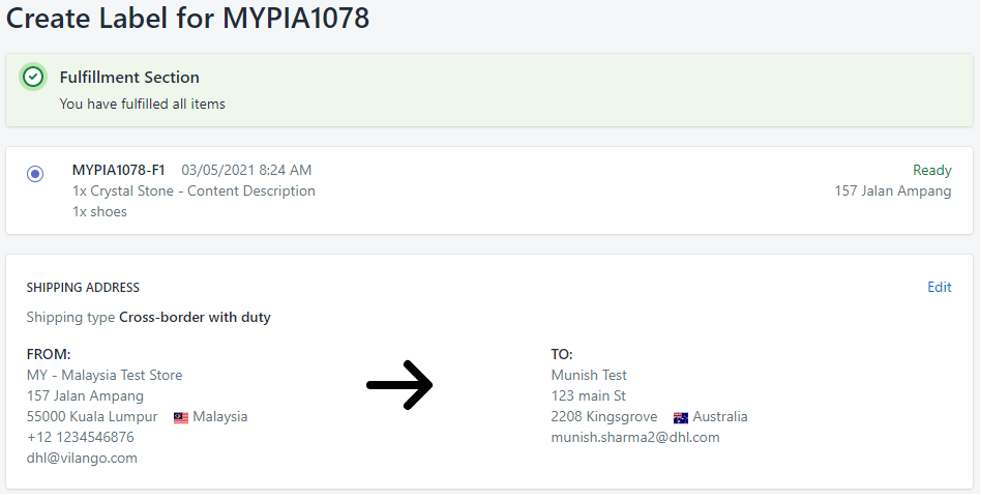
- On the create page of the label, you have to select the Fulfillment, which you would like to send and create a label. (
MYPIA1078in the example)
- In the first section, you can see which Fulfillments are possible for this order and which are selected.
- In the lower-left area FROM: there are the data of the sender, which are directly taken over from the Shopify Fulfillment, it’s dependent on the Location address.
- In the lower-right area TO: you can see the data of the receiver of the Order.
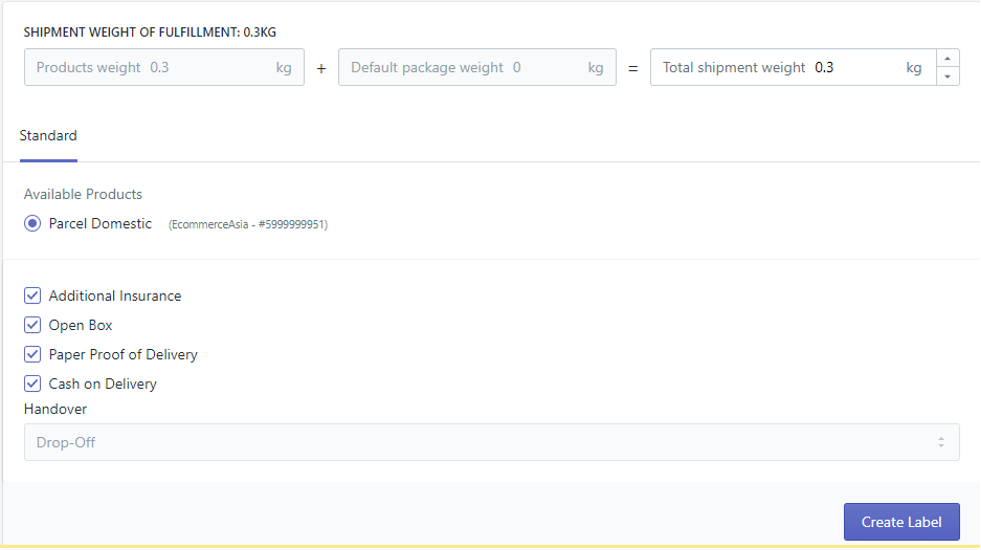
- If you scroll down you will get to Service Options. After you have selected all options, click on Create Label.

- Here you can choose the DHL product with which you want to create the label.
- The weight is made up of the sum of the product weights. These values are taken from the Shopify Products. However, the value can be manually adjusted here if necessary.
- Depending on your settings and the selected product, other additional services can be activated and deactivated here.
- Now the shipping label will be created, this can take a few seconds, if the process is completed you will see the most important data about the delivery. At the bottom of the page, you will find a preview of the shipping label. With a click on Download or Print you can download the shipping label or print it directly.
- If you would like to delete the label, you can do that with a click on Delete Label at the bottom of the page.
caution
You can only delete the label as long as the label was not passed to the system.